A shingle roof is one of the most popular choices for residential homes in North America, valued for its affordability, durability, and aesthetic versatility. However, the longevity and performance of a shingle roof depend almost entirely on the quality of its installation. A poorly installed roof can lead to leaks, wind damage, and premature failure, while a professionally installed asphalt shingle roof can last 20 to 30 years or more.
Beyond the basic advantages of low cost and easy availability, asphalt shingles dominate the North American roofing market for several specific reasons. They are lightweight compared to clay or concrete tile, making them suitable for most standard roof structures without additional reinforcement. They are also fire-resistant when properly rated, and many modern shingles come with algae-resistant granules that prevent unsightly black streaking in humid climates.
Finally, professional installation offers more than technical expertise. A reputable, family-owned roofing company provides transparency, quality materials, and craftsmanship. They begin with a free, no-obligation estimate, assessing your needs and providing a clear quote. After installation using high-quality materials, they perform a thorough quality assurance inspection for durability. The process ends with a final walkthrough and cleanup, ensuring you are completely satisfied. This personalized service, tailored to your unique needs, is why homeowners and businesses in Leander, Georgetown, and Pflugerville trust local experts for shingle or flat roof installations, repairs, and storm damage restoration.
Signs Your Shingle Roof Needs Replacement
Curling, cracked, or missing shingles, dark streaks from algae, and granules clogging gutters signal aging. Interior signs include water stains on ceilings or light entering through the attic deck. If your roof is more than 20 years old or shows widespread damage, professional inspection and replacement are necessary.
Step 1: Pre-Installation Preparation and Safety
Before a single shingle is laid, thorough preparation is essential.
- Safety First: Roofing is a high-risk activity. Professional installers use fall protection systems, harnesses, roof brackets, and properly secured ladders. Homeowners attempting a DIY installation should never work alone or in wet/windy conditions.
- Material Delivery and Storage: Shingles are heavy—a standard bundle of three-tab shingles weighs around 70-80 lbs. They should be stored in a dry, shaded area, stacked flat to prevent warping. Roofing felt, nails, drip edge, and underlayment are also delivered at this stage.
- Weather Considerations: Ideal installation temperatures range from 40°F to 85°F (4°C to 29°C). Cold weather makes shingles brittle and prone to cracking; hot weather can make them too soft to handle. If installation must occur in cold weather, shingles should be stored in a warm garage overnight and applied with hand sealing.
Step 2: Tear-Off and Deck Inspection
Unless the new roof is being installed over a single existing layer (allowed by some building codes), the old roofing material must be removed.
- Tear-Off Process: Workers use shingle shovels and pry bars to strip off old shingles, felt paper, and drip edge. All debris is collected in a dump trailer or dropped into a roll-off dumpster. Nails are pulled or hammered flat.
- Deck Inspection: Once the roof deck (usually ½-inch or ⁵⁄₈-inch OSB or plywood) is exposed, it is carefully inspected. Rotted, warped, or water-damaged sections are cut out and replaced. The deck must be clean, dry, and structurally sound. Any protruding nail heads are hammered flush.
Step 3: Installation of Underlayment and Drip Edge
The underlayment is a water-resistant barrier that protects the roof deck if water gets under the shingles.
- Drip Edge (First Layer): A metal drip edge is installed along the eaves (bottom edges) of the roof, extending slightly into the gutters. This prevents water from curling back under the shingles and protects the wooden fascia board.
- Ice and Water Shield: In colder climates (or as required by code), a self-adhering rubberized membrane is applied over the eaves, in valleys, and around roof penetrations (chimneys, skylights, vents). This prevents ice dams from forcing water under the shingles.
- Roofing Felt or Synthetic Underlayment: A layer of 15lb or 30lb felt, or a more modern synthetic underlayment, is rolled horizontally across the deck, starting at the eaves and overlapping each row by at least 2 inches. Synthetic underlayment is lighter, stronger, and more slip-resistant than felt.
- Drip Edge (Top and Rakes): A second layer of drip edge is often installed over the underlayment along the rakes (gable ends) to secure the underlayment and provide a clean edge.
Step 4: Flashing Installation
Flashing is thin metal (galvanized steel or aluminum) used to direct water away from critical junctions. Proper flashing is non-negotiable for a leak-free roof.
- Valley Flashing: In open valleys, a metal W-shaped channel is laid down the center. In woven or closed-cut valleys, shingles are layered over a wide strip of ice and water shield.
- Penetration Flashing: Step flashing is installed around chimneys and sidewalls, with each course of shingles overlapping a new piece of flashing. Pipe boot flashings (rubber collars with metal bases) seal around plumbing vents. Dormers and skylights receive custom step or continuous flashing.
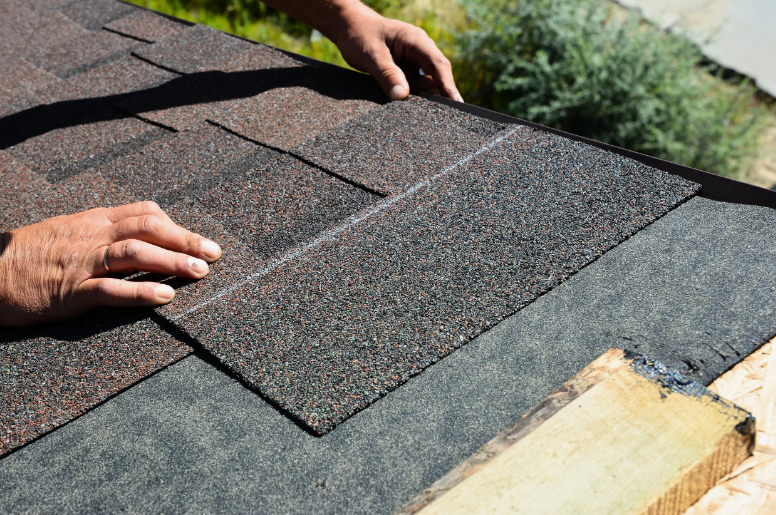
Step 5: Shingle Application – The Core Process
This is the most visible and critical part of the installation. Almost all modern asphalt shingles are installed using the same fundamental principles.
- Starter Strip: A row of starter shingles (or cut-down standard shingles with adhesive exposed) is installed along the eaves, just overhanging the drip edge by ¼ to ½ inch. This seals the gaps between the first course of shingles and prevents blow-offs.
- First Course: The first full course of shingles is laid directly over the starter strip. It overhangs the eave and rake edges slightly to allow water to drip into the gutters.
- Nailing Pattern: Each shingle is fastened with four to six roofing nails (depending on wind ratings and manufacturer specs). Nails must be placed in the manufacturer’s designated nailing zone—not too high (exposed to weather) and not too low (cutting through the shingle tab). Nail heads should be flush with the shingle surface, not overdriven or underdriven.
- Course Spacing: Each subsequent course is offset so that the tabs cover the nail heads of the course below. A common pattern is a 5-inch reveal (the exposed portion of each shingle). Chalk lines are snapped horizontally every 5 to 6 inches to keep rows straight.
- Vertical Offsetting: Shingle joints are staggered by at least 6 inches between courses to prevent water from tracking down continuous vertical gaps. Common patterns include a “stagger” of 6, 12, or 18 inches.
- Cutting Around Obstacles: Valleys, chimneys, pipes, and vents require shingles to be cut precisely. In valleys, shingles are trimmed to follow a chalk line (closed valley) or stop 2 inches from the center (open valley). Around pipes, a hole is cut in the shingle to fit over the pipe boot.
Step 6: Ridge Cap and Hip Installation
The ridge (horizontal peak) and hips (sloped edges) are finished with specially designed ridge cap shingles.
- Creating Caps: Three-tab shingles can be cut into individual tabs to make caps, but pre-formed ridge cap shingles are easier and more attractive.
- Installation: Caps are installed starting from one end (or from the bottom on a hip), overlapping each piece by about half its length. Each cap receives two nails on each side, which will be covered by the next cap. The final cap is sealed with a dab of roofing cement.
- Ventilation Ridge: If the roof uses a ridge vent system, a continuous vent strip is installed along the ridge before the caps. This allows hot, moist air to escape from the attic, extending the life of both the roof and the home’s insulation.
Step 7: Final Cleanup and Inspection
A professional installation isn’t complete until the worksite is clean and the roof is inspected.
- Magnetic Sweeping: Powerful rolling magnets are used to collect stray nails from the driveway, lawn, and gutters. A single missed nail can cause a flat tire or injure a pet or child.
- Debris Removal: All old shingles, felt, underlayment scraps, and packaging are hauled away.
- Final Walkaround: The installer inspects for exposed nail heads, lifted shingles, gaps around flashings, and proper alignment. They will also check attic ventilation and ensure drip edges are correctly positioned.
Common Mistakes to Avoid
Even experienced DIYers can make errors that lead to early roof failure:
- Using too few nails (less than 4 per shingle)
- Nailing in the wrong zone (through the exposed tab)
- Overdriving nails (cracks the shingle and allows water entry)
- Failing to seal shingles in cold weather (adhesive strips need warmth or manual sealing)
- Ignoring manufacturer specifications (which override generic instructions)
Conclusion
Shingle roof installation is a systematic process that rewards attention to detail. From the initial tear-off to the final ridge cap, each step builds upon the last to create a unified, watertight system. While a determined homeowner can install a small, simple roof, the risks of injury, material waste, and hidden leaks often make professional installation the wiser investment. When done correctly, a shingle roof offers decades of reliable protection and enhances the curb appeal and value of any home.
FAQs
1. How long does it take to install a new shingle roof on an average home?
For a typical 2,000-square-foot single-family home, a professional crew of 4-5 roofers will usually complete a full tear-off and re-roof in 1 to 2 days.
2. Can I install new shingles over my existing roof?
Yes, many building codes allow one additional layer of shingles over an existing asphalt shingle roof, provided the existing roof is flat, free of rot, and has no more than one previous layer.
3. What type of nails should be used for shingle installation?
Use galvanized steel roofing nails with a minimum thickness of 12-gauge. The nail head should be at least ³⁄₈-inch in diameter. Nail length must be sufficient to penetrate through the shingle and underlayment and embed at least ¾-inch into the roof deck (or through the deck if using OSB/plywood).